If you subtitle your videos in Premiere, get the Inwista panel. It sends your sequence to Inwista for transcription and gives you back subtitles that read as if a professional subtitler made them, right on your timeline. While it works, you finish the sound mix and the color correction. By the time you are done, so are the subtitles. I love this plugin!
Where did the Inwista panel come from?
I asked for it. I had used Inwista for a while, because it transcribes far more accurately than Premiere's Speech to Text and formats subtitles the way I want them. The way a professional would do it. The only annoying part was moving files back and forth: export the audio, upload it, wait, download the SRT, import it into Premiere.
So I asked Inwista to build a panel for Premiere, and they did. Now the round trip happens inside Premiere, with one click.
Why not just use Premiere's own captions?
Because Premiere gives you a transcript cut into pieces, and Inwista gives you subtitles. Inwista is transcription built for subtitling, and it has all the features Premiere is missing:
- Verbatim or condensed: keep every word people say, or let Inwista simplify the text so it is easier to read.
- Line balancing: choose how each subtitle is split over two lines, and which line should be the longest.
- Continuation marks: a dash or an ellipsis when a sentence runs on into the next subtitle.
- Speakers and translation: dialogue formatting, and subtitles in a long list of other languages.
All the subtitle features in Inwista are in the panel too. Start from one of the presets (standard, TikTok and Reels, or TV and streaming) and adjust whatever you like.
What makes the subtitles look professional?
The secret sauce is Text Condensation. Spoken language is messy: false starts, repetitions, "sort of" and "you know". Put all of that on screen word for word and the viewer spends the whole shot reading. A professional subtitler trims it down so the meaning stays and the clutter goes.
That is exactly what Text Condensation does. I like to set it to Aggressive, which is not nearly as aggressive as it sounds. The result reads like the work of a professional subtitler. Choose None (Verbatim) when you need every word.
How do I get the Inwista panel?
First, create an account at Inwista. The Free plan does not need a card. Then install the panel from the Creative Cloud desktop app: go to Stock & Marketplace ▸ Plugins, search for Inwista and click Get. Then open it in Premiere with Window ▸ UXP Plugins ▸ Inwista, click Sign in with Inwista, and connect it to your workspace.
What does the workflow look like?
- Open the sequence that needs subtitles.
- Choose which audio tracks to transcribe. Leave out music and sound effects.
- Set the spoken language, and turn on Label speakers if you want them named.
- Pick a preset or your own settings. Mine has Aggressive Text Condensation.
- Click Start formatting, and go back to the mix and the grade.
When the subtitles are ready, they land on your sequence as a caption track. To correct a word or add a language, click Edit in Inwista and finish the job in the browser. Or simply edit the captions in Premiere's Text panel.
Using MOGRTizer templates in the same edit? Set Keep Clear for Subtitles on your lower thirds, and they move up to make room for the subtitles.
Which settings do I recommend in the Inwista panel?
In the Formatting tab, tick only the audio tracks with dialogue, choose the language that is spoken, and leave Label speakers off unless you need the names.
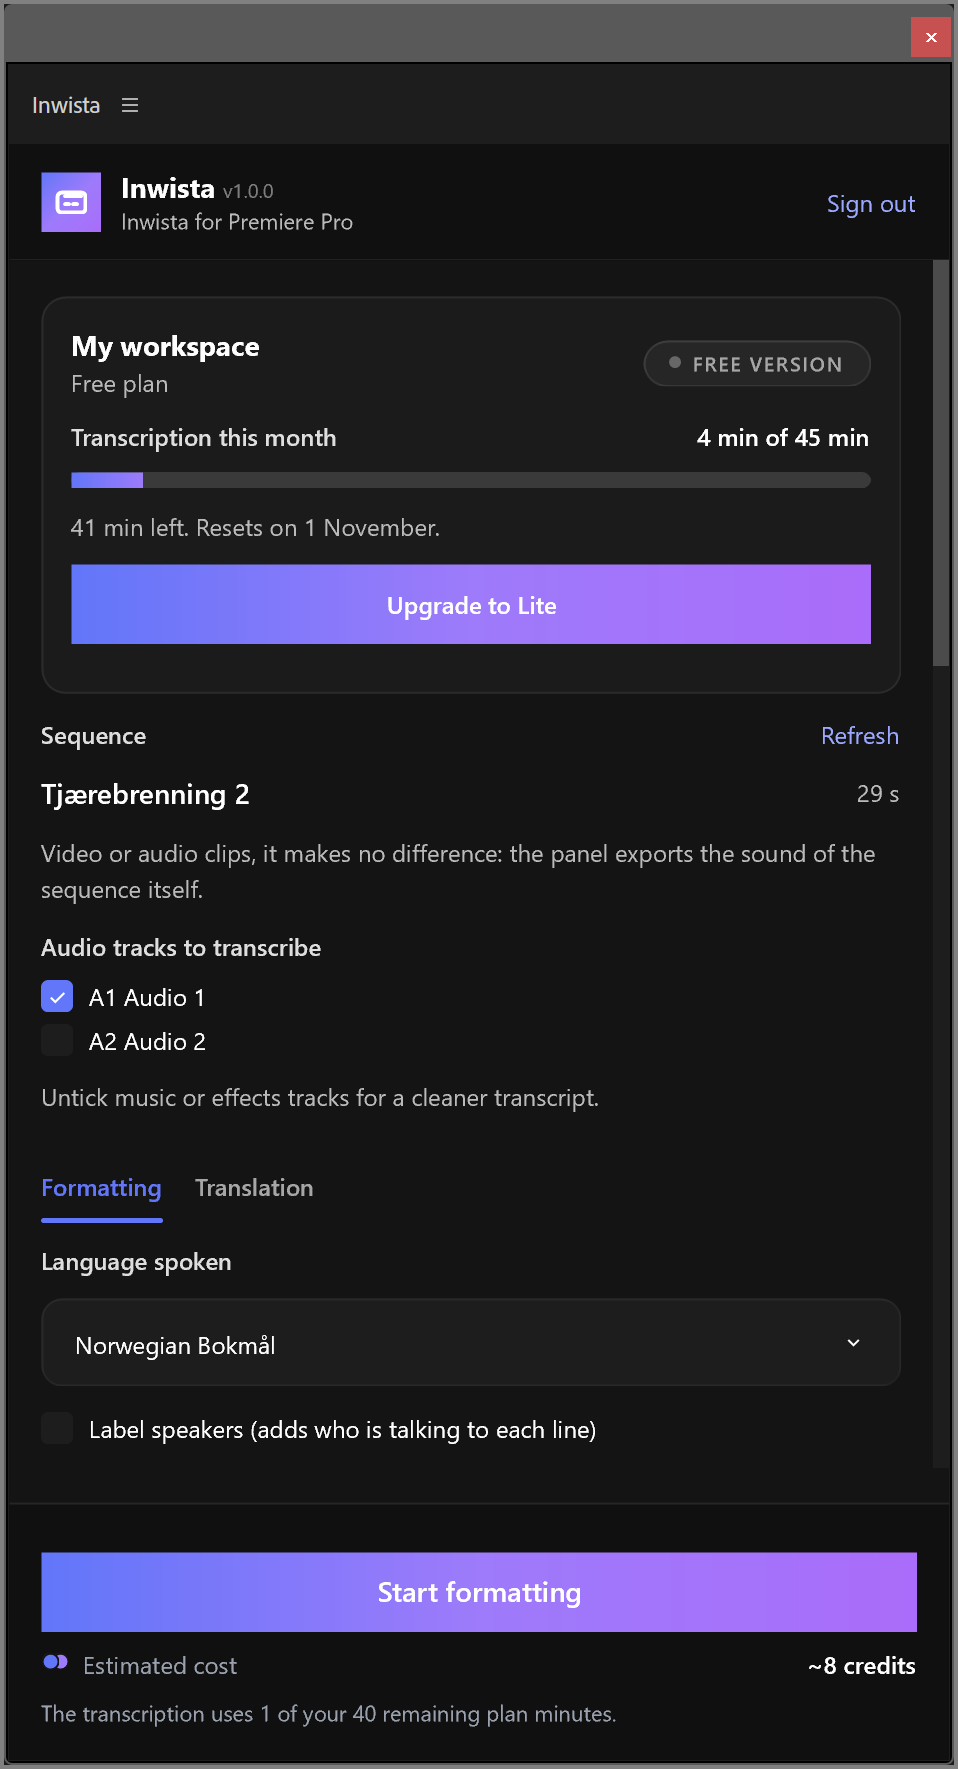
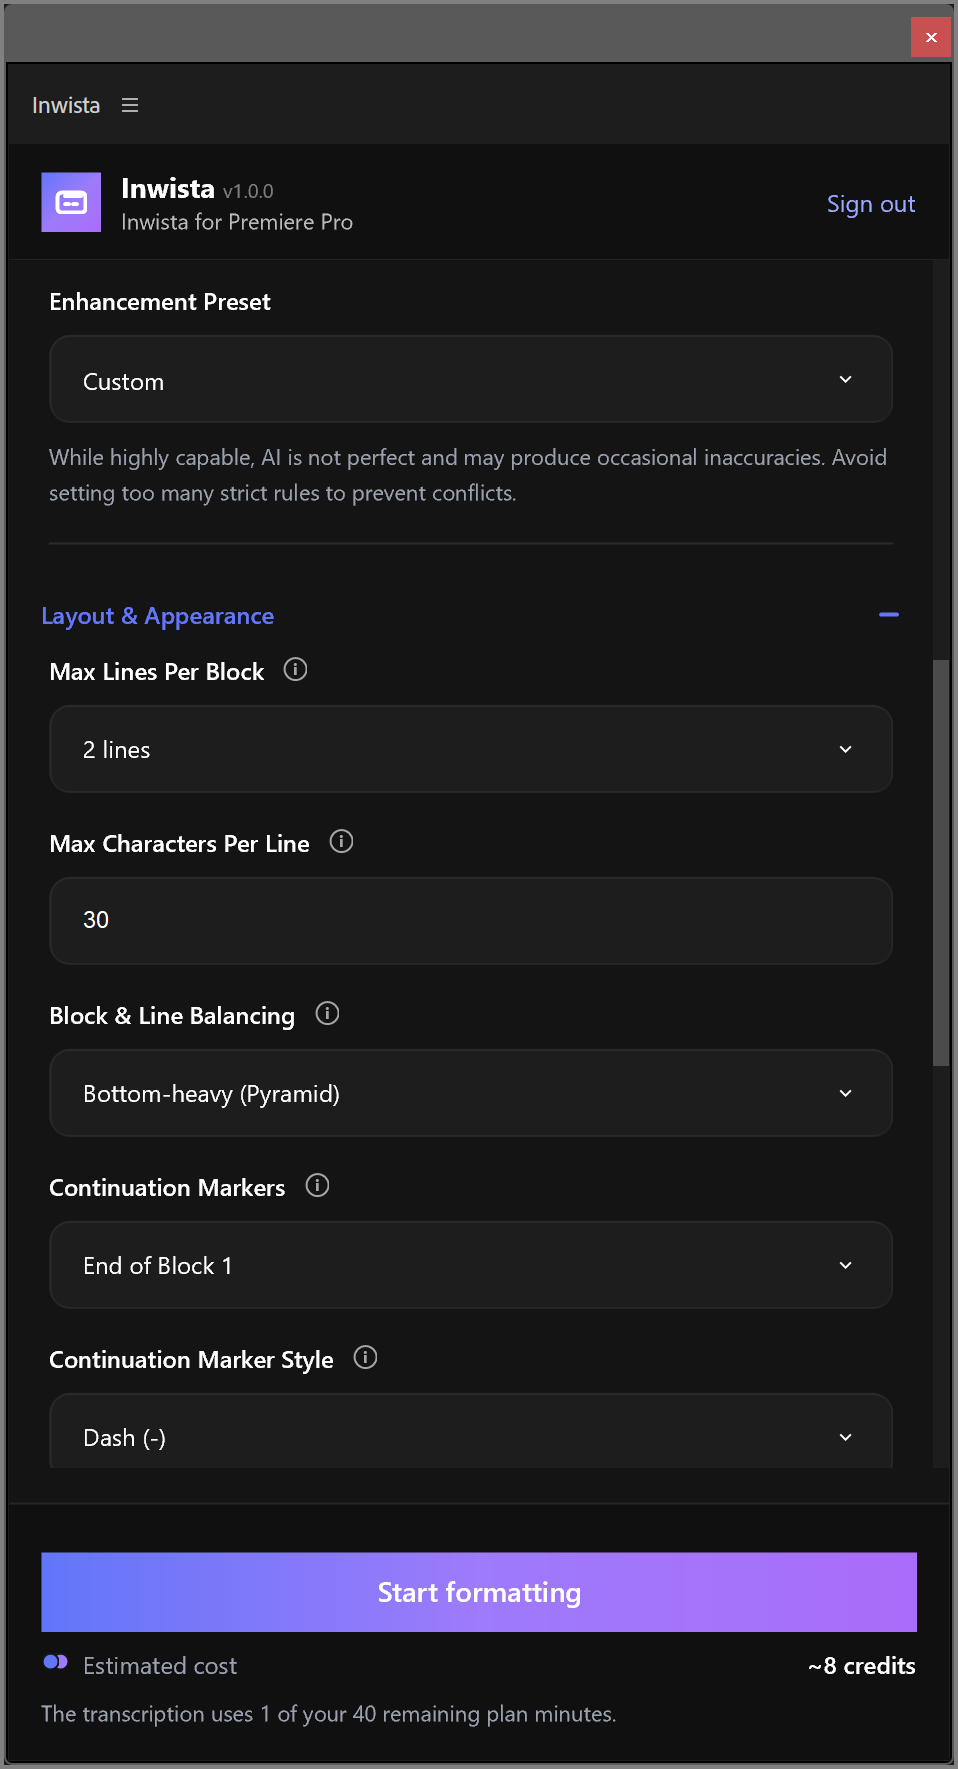
I start from the Standard (default) preset and set it up once. The panel remembers the settings on your computer, so the next job is just a click.
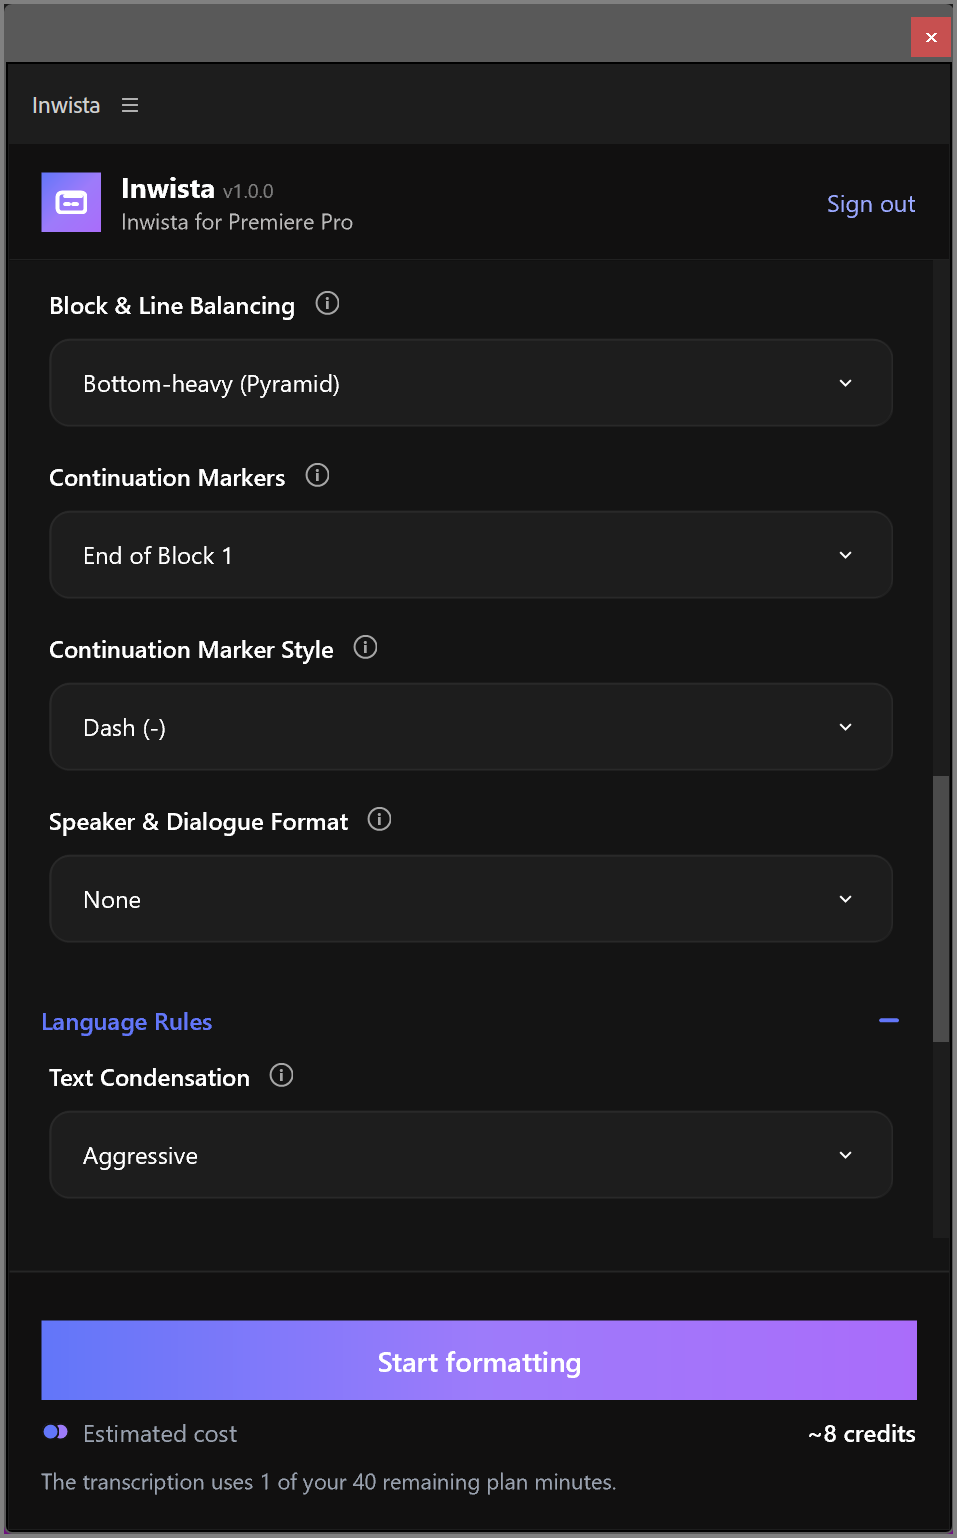
Under Layout & Appearance, I use 2 lines per subtitle and a maximum of 30 characters per line, which makes the captions work in both horizontal and vertical video. Sometimes I use one line per subtitle in vertical video. Block & Line Balancing is set to Bottom-heavy (Pyramid), so the bottom line is the longest. Continuation Markers is set to End of Block 1, with a dash as the marker.
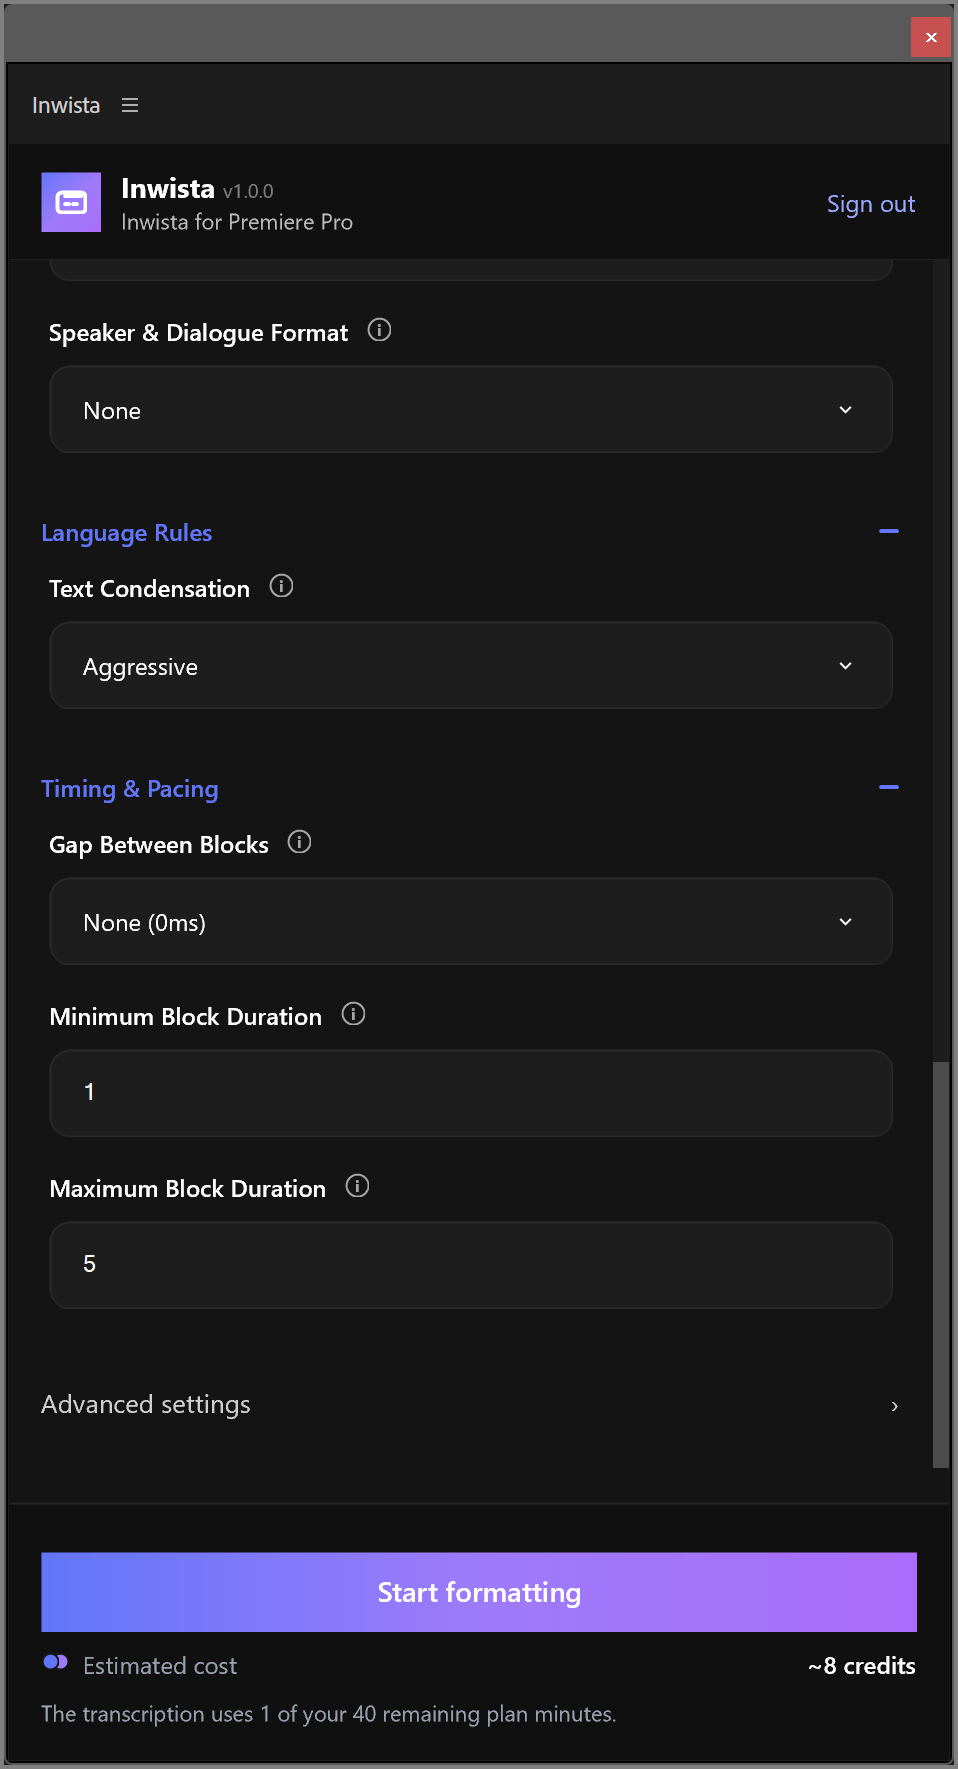
Further down, Speaker & Dialogue Format is set to None and Text Condensation to Aggressive. Under Timing & Pacing, there is no gap between blocks, and each subtitle stays on screen for at least 1 second and at most 5 seconds.
Frequently asked questions
What does the Inwista panel cost?
The panel itself is free. You need an Inwista account, and the Free plan comes with some transcription minutes each month. Formatting and translation use AI credits, and the panel tells you the estimated cost before every job.
Which Premiere version do I need for the Inwista panel?
Premiere 25.6 or newer, on Mac or Windows.
Do I have to wait while Inwista works?
No. The panel sends the audio off, and you carry on editing while the subtitles are made.
Can the Inwista panel make subtitles in another language?
Yes. Use the Translation tab in the panel. Each job gives you one target language.
The Inwista links in this post are referral links.